Sage, the unparalleled sentinel and healer, brings a unique set of tools to the Valorant battlefield. Her Barrier Orb has the potential to shift the tides of battle significantly.
In this guide, we will delve into the strategic deployment of Sage Pearl walls, exploring the best wall placements for various scenarios. From A Site to Mid and B Site, these Sage wall positions will provide you with a tactical edge.
Sage Pearl Map Walls Placements in Valorant
Sage’s Barrier Orb possesses versatile potential, allowing you to reshape the course of battles. We’ll explore how well-placed Sage Pearl walls can turn the odds in your favor.
Pearl A-Main Sage Wall
A-Main is a key chokepoint that attackers often rush through. Placing a Sage wall here creates a formidable barrier that impedes enemy progress.
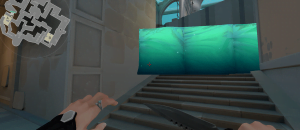
This buys your team valuable time to react and set up crossfires. As attackers attempt to break through the wall, you gain the upper hand in engagements.
Moreover, this wall placement encourages attackers to reconsider their strategy, potentially diverting them towards other routes and disrupting their coordinated push.
Pearl A Link Sage Wall
A Link serves as a vital connector between different parts of the map. By strategically positioning a Sage wall here, you disrupt enemy advances and control their movement options.
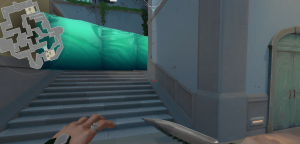
This not only slows down attackers but also funnels them into narrower spaces, making them easier targets for your team.
The A Link Sage wall is particularly effective when combined with crossfire setups, allowing you and your teammates to maximize your firepower and thwart enemy pushes effectively.
Pearl Mid Doors Sage Wall
Securing control over Mid is essential in dictating the flow of the game. A Sage wall at Mid Doors is an effective way to limit attackers’ options and control their movement.
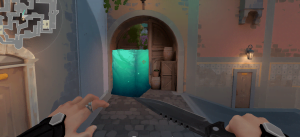
By denying them a direct path to B Link and Mid Connector, you force them into either a frontal assault or a longer route, both of which play into your team’s hands.
This wall placement is particularly potent when supported by teammates holding positions that can capitalize on the narrowed avenues of attack.
Pearl Mid Connector Sage Wall
Mid Connector is a critical point of rotation on the Pearl map, and a Sage wall here can disrupt attackers’ plans.
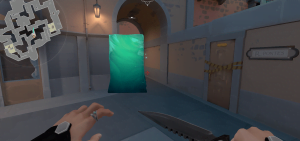
Placing the Barrier Orb at Mid Connector denies easy access for enemies attempting to rotate from one side of the map to the other.
This hampers their ability to execute split pushes effectively and gives your team an advantage in controlling the pace of the match.
By effectively blocking off this crucial passage, you increase the odds of isolating enemies and securing key frags.
Pearl B-Main Sage Wall
B-Main is a common avenue for attackers to approach the B Site, and a Sage wall at this location can provide defenders with valuable time.
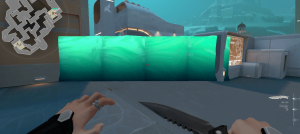
Placing the Barrier Orb at B-Main slows down attackers, forcing them to reconsider their approach. This will provide your team with moments to reposition or even mount counterattacks.
By utilizing this wall placement, you control the flow of engagements and create opportunities for your team to execute well-coordinated defensive strategies.
Pearl B Screens Sage Wall
B Screens provide ample cover for attackers attempting to breach the B Site, making it an opportune location for a Sage wall.
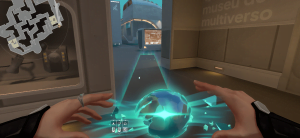
Placing the Barrier Orb here not only obstructs attackers’ lines of sight but also positions defenders advantageously.
By surprising attackers, as they maneuver around the wall, defenders gain a clear advantage in engagements, enabling them to capitalize effectively on this element of unexpectedness.
Conclusion
Mastering Sage’s Barrier Orb requires an understanding of the Pearl map’s dynamics and tactical timing. Incorporating these Sage wall placements into your strategy will elevate your impact and contribute to your team’s success.

